Gap Year: Teaching an E-Type’s Bonnet, Doors and Boot to Line Up Again
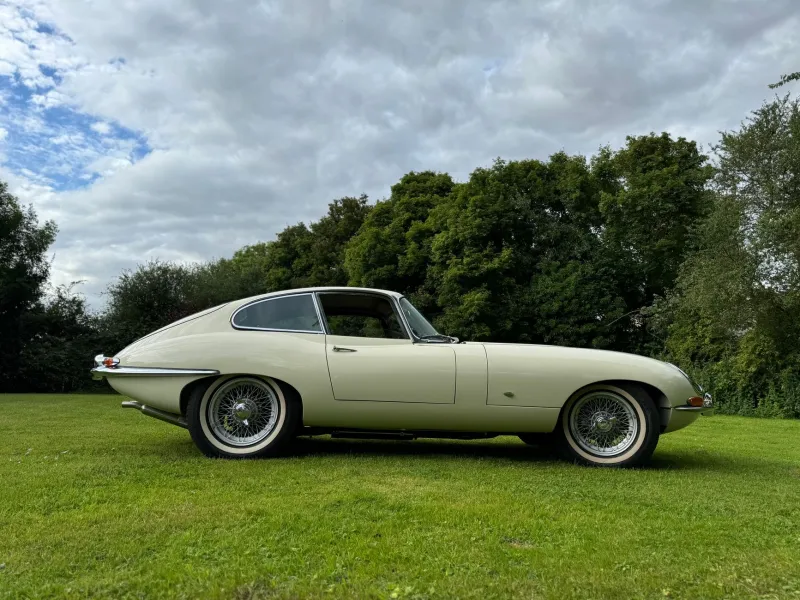
There is a particular silence in a workshop when an E-Type bonnet is bolted back on after paint. Everyone stands back, folds their arms, and pretends not to look at the gap by the scuttle. Then somebody says the immortal words: ‘It’ll settle.’ It might. It usually doesn’t.
E-Type panel gaps are not a single job. They are a negotiation between a 60-year-old monocoque, a bolt-on bonnet the size of a dinghy, hinge pins that have done 100,000 miles, and a paint finish you have already paid for. The good news is that it is rarely a filing problem. Most of the time it is an order-of-operations problem, a worn-hinge problem, or a shim problem wearing a disguise.
Stop chasing the bonnet first
The temptation is to fit the bonnet and start adjusting it because it is the biggest, most dramatic panel in the garage. Resist that. On an E-Type, the doors set the datum for the whole side of the car. If the doors are sitting wrong in their apertures, the bonnet has no honest reference point at the scuttle or the sill, and the boot lid is being judged against a body that is still twisted.
My order is boring and effective: settle the car, fit and adjust the doors, then the bonnet, then the boot lid. Before any of that, the suspension needs to be loaded as it will be on the road. A shell on jack stands with the wheels dangling is not the shape it will be when it is sitting on its tyres. Roll it, bounce it, or put it on ramps with the weight on the suspension. Only then do you start reading gaps.
The order I use
- Check the shell is settled and supported evenly. If the car is on a jig or rotisserie, make sure it is not being held in a twist.
- Fit the doors with the seals out, or at least with the seals loose. A new door seal can push a door out by 3–4mm and send you hunting for hinge adjustments that are not needed.
- Set the door gaps to the sill, A-post and rear quarter. Aim for an even gap before you chase a tight one. A consistent 4mm gap looks better than a 3mm gap that goes to 6mm halfway down.
- Fit the bonnet to the scuttle and check the gaps to both doors. Adjust at the hinge shims and the bonnet frame before touching the edges.
- Fit the boot lid last. It is the easiest panel to adjust and the least likely to influence the rest of the car.
That sequence saves hours. It also stops you from filing a bonnet edge to suit a door that is sitting 5mm too low.
Reading a gap properly
Eyeballing a gap is fine for a rough check, but it is useless for diagnosis. Use a set of feeler gauges or a dedicated panel gap gauge. I also keep a length of 3mm welding rod and a roll of masking tape handy. Tape the rod across the gap at five or six points — top, middle, bottom, and both ends — and write the numbers down. Photograph them. You will forget.
Measure the gap perpendicular to the panel edge, not at an angle. Check the flushness as well as the width. An E-Type bonnet can have a perfect 4mm gap and still sit 2mm proud of the door, which is what your eye actually notices in sunlight. A straightedge across the joint is more honest than a feeler gauge alone.
Shim tricks that save paint
Shims are your friend, but only in sensible quantities. The bonnet hinges on an E-Type are shimmed at the body mounting points, and doors can be shimmed at the hinges. Use proper steel or brass shims rather than a stack of washers, and keep the stack as thin as possible. If you need more than about 6mm of shim, stop and ask why. Usually it means a hinge is bent, a mounting point has been repaired badly, or the shell is not settled.
Tapered shims are useful where a gap closes gradually along a panel edge. I have also used temporary plastic shims taped in place to prove a point before making a permanent metal shim. The aim is to move the panel in the direction it needs to go without stressing the hinge or cracking fresh paint around the mounting bolts.
Always loosen the hinge bolts gradually and in sequence. Do not undo one bolt fully and lever the panel. That is how you chip an edge or crack a fillet of paint that took a week to cure.
Diagnosing worn hinges
A worn hinge will defeat every shim in the box. Door hinges wear at the pin and bush. With the door open, lift the rear edge gently. Any noticeable up-and-down movement means the hinge needs attention. Bonnet hinges wear at the pivot; with the bonnet supported, rock it gently and watch for slop at the hinge. Boot hinges are simpler but still wear at the pivot.
Rebuild kits are available from the usual UK suppliers — Martin Robey, SNG Barratt and David Manners are the first names I check. A door hinge rebuild kit is usually £60–£150 per hinge depending on the series and supplier. Bonnet hinge parts are similar. It feels painful to spend that after a respray, but it is cheaper than repainting a bonnet edge because the hinge moved under load.
When to stop filing
Filing should be the last resort, not the first. If a gap is tight only at one small high spot, a light draw-file with a guide coat can help. If the gap is tight along a long edge, you have an adjustment problem. If the panel is proud or sunk, you have a hinge or shim problem. If the gap changes when the bonnet is latched, you have a catch or frame problem.
Stop filing when the gap is consistent and the panels are flush enough that your eye stops being drawn to them. Chasing a perfect 3.5mm gap all round on a 60-year-old shell is a route to thin edges, broken paint and a bonnet that looks worse than when you started. A real-world E-Type has slightly uneven gaps. The trick is to make them evenly uneven.
UK suppliers and realistic costs
For shims, hinge kits, catches and rubbers, Martin Robey, SNG Barratt, David Manners and Hutson’s are the regular ports of call. A home restorer doing the adjustment themselves should budget £40–£100 in consumables — feeler gauges, masking tape, shims, penetrating oil, replacement bolts — plus £120–£300 if a pair of hinges needs rebuilding. If you hand the car to a specialist for a full panel alignment, expect £500–£1,500 depending on how much disassembly and paint protection is involved. Time-wise, a patient home restorer should allow 12–30 hours for doors, bonnet and boot, spread over several sessions. Do not plan to do it the day before a show.
Pre-paint measuring checklist
Before the paint goes on, measure and record everything. It is far easier to adjust bare metal than fresh cellulose or two-pack.
- Gap at the top, middle and bottom of each door to the A-post, sill and rear quarter.
- Bonnet gap to both doors at the top and bottom of the shut line.
- Bonnet gap to the scuttle, measured at both ends and in the centre.
- Boot lid gap to the rear quarters and rear panel.
- Flushness of every panel with a straightedge, not just gap width.
- Hinge play with the panel open and supported.
- Latch and catch alignment before final tightening.
- Shim stacks photographed and noted, so you can put them back in the same order.
Write the numbers on masking tape and stick it inside the workshop door. Then, when the paint is dry and nothing lines up, you will know whether the car has moved or whether your memory has. Usually it is the memory. The E-Type rewards patience here. Adjust, measure, adjust again, and leave the file in the drawer until you are absolutely sure it is the last tool you need.